DIY Affordable Composite Fencing Projects: Easy Steps for Your Backyard
Introduction to Affordable Composite Fencing
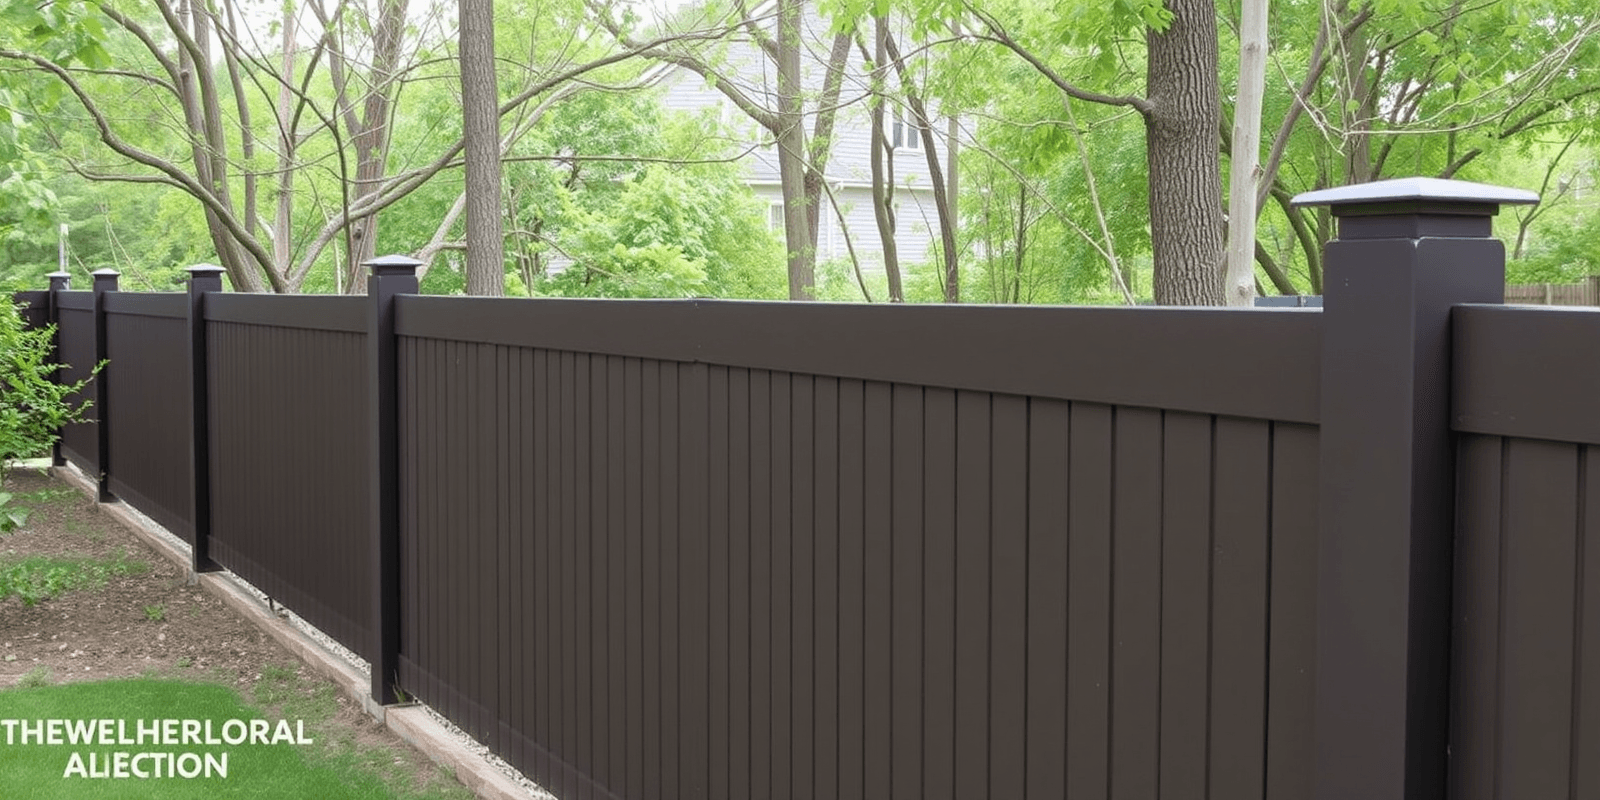
Creating a backyard that is both functional and aesthetically pleasing can be a challenging task. One of the best ways to enhance your outdoor space is by installing a fence. Not only does it provide privacy and security, but it also adds a decorative touch to your landscape. Composite fencing is an excellent choice for those looking for a low-maintenance, eco-friendly option. It is made from recycled materials and requires minimal upkeep, making it a cost-effective solution for homeowners.
Step-by-Step Guide to Installing Your Own Composite Fence
Installing a composite fence can be a rewarding DIY project if you follow these easy steps:
Step 1: Planning and Preparation
Before beginning any construction project, it’s essential to plan and prepare thoroughly. Measure the area where you want to install the fence and decide on the style and height you prefer. Check local building codes and regulations to ensure compliance. Gather all necessary tools and materials, including posts, rails, panels, screws, and concrete. Make sure to have a level, post hole digger, shovel, saw, drill, and safety gear on hand.
Step 2: Setting Posts
The first step in installing your fence is setting the posts. Begin by digging holes for each post using a post hole digger or shovel. Ensure the holes are deep enough to accommodate the posts and wide enough to allow for proper drainage. Place the posts in the holes and check for levelness using a level tool. Pour concrete into the holes around the posts, following the manufacturer’s instructions. Allow the concrete to set according to the recommended drying time before proceeding.
Step 3: Installing Rails
Once the posts are secure, it’s time to attach the rails. Use screws to connect the rails to the posts, ensuring they are level and aligned properly. The number of rails you need depends on the height of your fence and the spacing requirements specified by the manufacturer. Double-check that the rails are securely fastened and level before moving on to the next step.
Step 4: Attaching Panels
The final step is attaching the composite panels to the rails. Start at one end of the fence and work your way along, securing each panel with screws. Ensure that the panels are evenly spaced and flush against the rails. Trim any excess material with a saw if needed. Double-check that all panels are securely attached before considering the project complete.
Tips for Successful Installation
To ensure a successful installation, follow these tips:
- Always wear protective gear, including gloves and safety glasses.
- Use a level tool throughout the process to maintain accuracy.
- Follow the manufacturer’s instructions for proper installation techniques.
- Allow sufficient drying time for concrete and adhesives.
- Consider hiring professionals for complex installations or if you lack experience.
Potential Design Ideas for Affordable Composite Fencing
Composite fencing offers numerous design options to match your personal style and needs. Some popular designs include lattice-top fences, privacy fences, and picket fences. You can also add decorative elements like flower boxes or trellises to enhance the look of your fence. Experiment with different colors and textures to create a unique and inviting outdoor space.
Conclusion
Installing an affordable composite fence can be a satisfying DIY project that enhances your backyard’s appearance and functionality. By following these steps and tips, you can successfully create a beautiful and durable fence that will last for years. Remember to plan carefully, use quality materials, and take your time to achieve professional results.
Reviews
There are no reviews yet.