DIY Composite Brick Fencing Installation Tips
Introduction
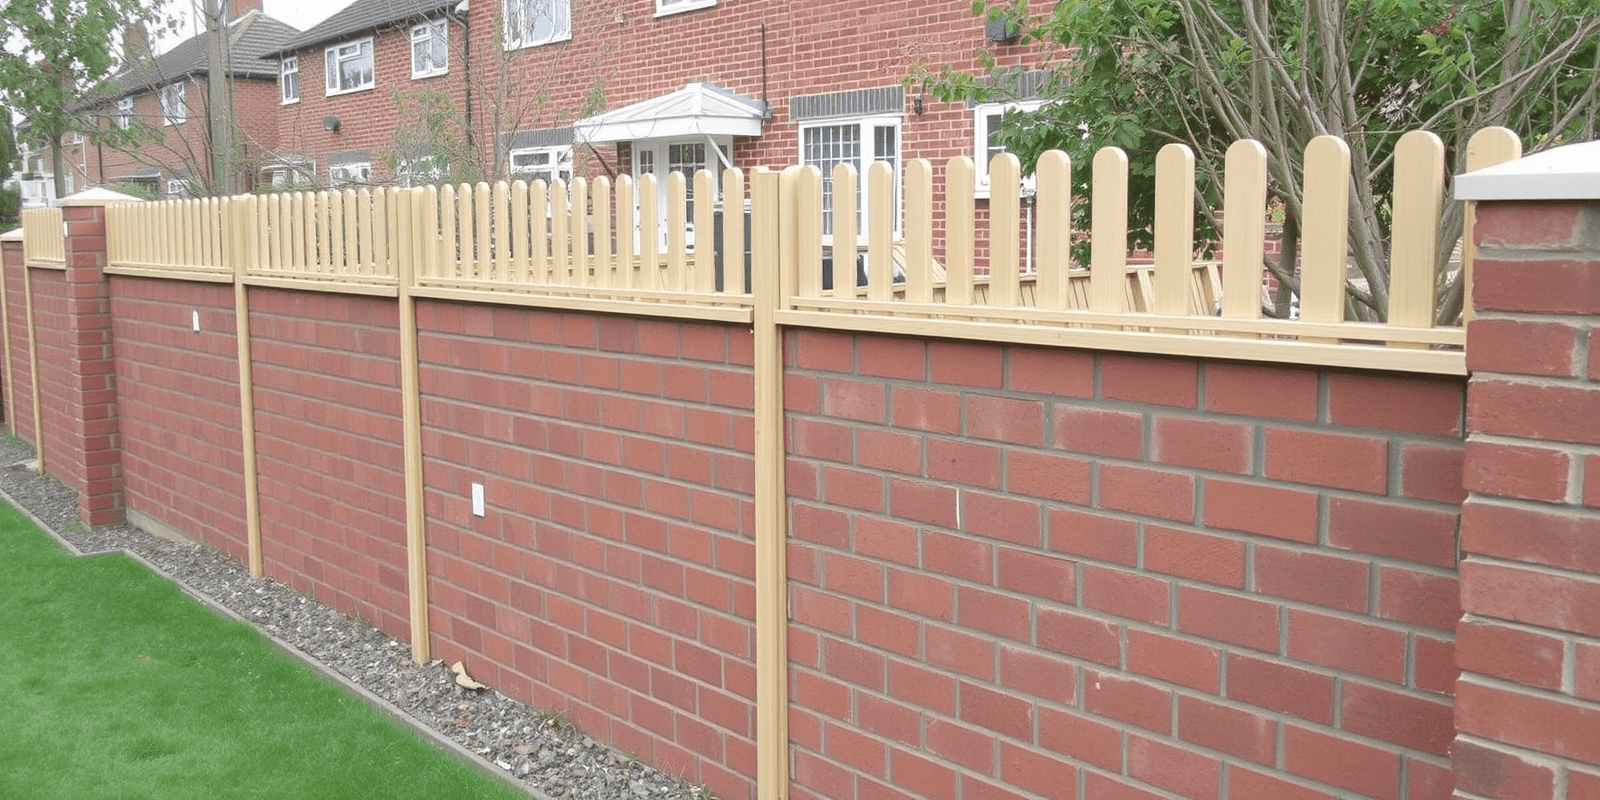
Welcome to your comprehensive guide on how to install composite brick fencing on your own. This DIY project is an excellent way to enhance the aesthetic appeal and security of your property. Composite brick fencing combines the natural beauty of traditional brick with the durability and low-maintenance benefits of modern materials. With the right tools and techniques, you can create a fence that not only adds value to your home but also stands the test of time.
Step 1: Planning Your Composite Brick Fencing Project
The first step in any successful DIY project is thorough planning. Begin by measuring the length of the area where you want to install the fence. Take note of any obstacles such as trees, utility lines, or existing structures that might affect your installation. It’s also important to check local building codes and regulations regarding fence height and placement. For instance, many municipalities require fences to be a certain distance from property lines or have specific setback requirements. You can find detailed information about these regulations on your city or county website or by contacting your local building department. Additionally, consider consulting a professional if you’re unsure about any aspect of the planning process.
Step 2: Gathering Materials and Tools
Once you’ve planned out your fence layout, it’s time to gather all the necessary materials and tools. The primary material for this project will be composite bricks, which are typically sold in kits that include everything needed for installation. Ensure that you purchase enough bricks to cover the entire length of your fence, plus a few extras for any mistakes or adjustments. Other essential items include concrete mix, gravel, stakes, and a level. Tools required for this project include a shovel, tamper, trowel, tape measure, safety glasses, and work gloves. You can find most of these items at your local hardware store or online retailers like Home Depot or Lowe’s. Make sure to double-check the dimensions and compatibility of your tools with the composite brick fencing system you plan to use.
Step 3: Preparing the Site
Before you begin laying the bricks, you need to prepare the site by clearing the area of debris and vegetation. Use a shovel to dig a trench along the fence line, ensuring it is deep enough to accommodate the depth of the composite bricks plus a layer of gravel for drainage. The typical depth for the trench should be around 8 inches, but this can vary depending on your soil type and climate conditions. After digging the trench, compact the bottom using a tamper to create a firm foundation. Then, add a layer of gravel to improve drainage and prevent water from pooling around the base of the fence. This step is crucial for preventing water damage and ensuring the longevity of your composite brick fencing. For more information on preparing the site, refer to the manufacturer’s instructions or consult resources like the American Society of Landscape Architects (ASLA) guidelines.
Step 4: Installing the Composite Bricks
With the site prepared, it’s time to start laying the composite bricks. Begin by placing the first row of bricks at one end of the trench, making sure they are level and aligned properly. Use a level to ensure each brick is perfectly horizontal. If necessary, adjust the position of the bricks by adding or removing small amounts of gravel underneath them. Once the first row is in place, continue laying subsequent rows, ensuring each brick overlaps the previous one by at least half its width. This technique, known as interlocking, provides additional stability and strength to the fence. As you lay each row, use a trowel to apply a thin layer of mortar between the bricks, ensuring a snug fit. Continue this process until you reach the desired height of your fence. Remember to periodically check the levelness of the fence as you build upwards to maintain a straight and even appearance. For detailed instructions on laying composite bricks, refer to the manufacturer’s guidelines or consult landscaping experts like This Old House.
Step 5: Finishing Touches
After completing the main structure of your fence, there are a few finishing touches to add. First, fill any gaps between the bricks with mortar or sealant to prevent moisture from seeping in. This step is crucial for maintaining the integrity of the fence over time. Next, install any decorative elements such as caps or finials on top of the fence. These additions not only enhance the look of your fence but also provide protection against weathering. Finally, clean up the area around the fence, removing any excess mortar or debris. Regular maintenance, including cleaning and occasional resealing, will help keep your composite brick fencing looking its best for years to come.
Conclusion
Installing a composite brick fence is a rewarding DIY project that can significantly improve the appearance and security of your property. By following these steps and taking the time to plan carefully, you can create a beautiful and durable fence that stands the test of time. Remember to always follow safety guidelines and seek professional advice when needed. With patience and attention to detail, you’ll be able to enjoy the fruits of your labor for many years to come.


Reviews
There are no reviews yet.