DIY Composite Decking Planters: Step-by-Step Guide
Introduction
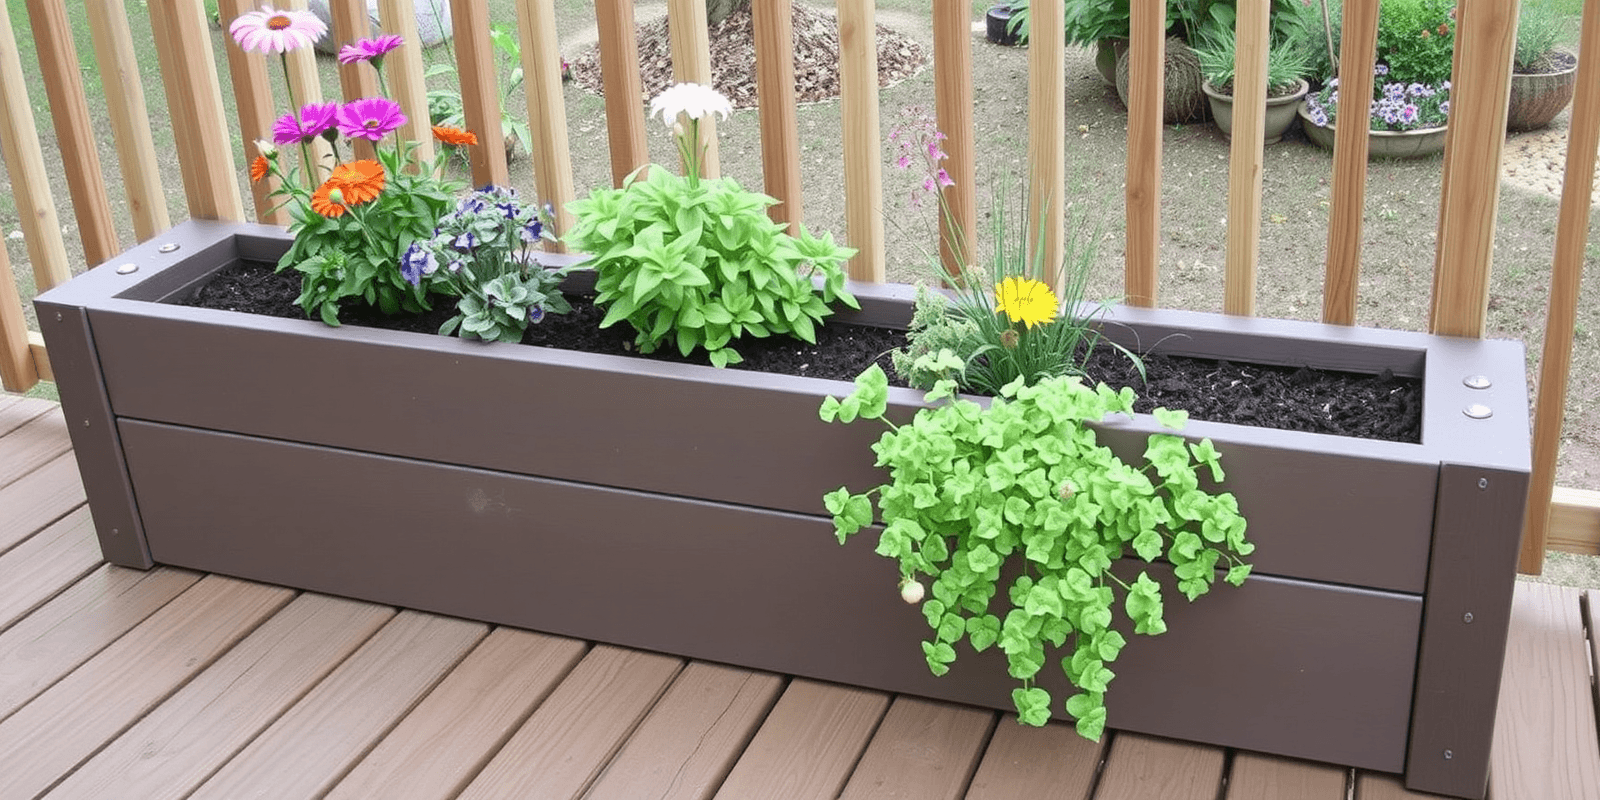
Composite decking has become a popular choice for outdoor living spaces due to its durability, low maintenance, and natural aesthetic. One creative way to enhance your deck is by building your own planters using this versatile material. This DIY guide will walk you through the process of creating beautiful and functional composite decking planters. Whether you’re looking to add some greenery to your deck or want to create a unique focal point, these planters are a great project to undertake.
Materials and Tools Required
To build your composite decking planters, you’ll need the following materials and tools:
- Composite Decking Boards: Choose boards that match the style and color of your deck for a cohesive look.
- Wood Screws: Use stainless steel screws to prevent rusting.
- Composite Decking Trim: For the bottom edge of the planter to cover any gaps and give it a finished look.
- Saw: A circular saw or miter saw for cutting the composite decking boards.
- Drill: For drilling pilot holes and attaching the boards together.
- Measuring Tape: To ensure accurate measurements.
- Square: To make sure all corners are at 90-degree angles.
- Level: To ensure your planter stands straight.
- Paint or Stain (Optional): If you want to customize the color of your planters.
Step-by-Step Instructions
Step 1: Design and Planning
Before starting, sketch out your design and decide on the dimensions of your planters. Measure the space where you intend to place them to ensure they fit perfectly. Consider the size of the plants you plan to grow, as this will affect the overall dimensions of the planter.
Step 2: Cutting the Composite Decking Boards
Using your saw, cut the composite decking boards according to your design specifications. Ensure that all cuts are straight and clean. Remember to wear protective gear such as goggles and gloves during this process.
Step 3: Assembling the Planter
Begin by laying out the boards in the shape of your planter. Use the drill to pre-drill holes in the boards to avoid splitting them when screwing them together. Attach the boards using wood screws, ensuring that each joint is secure. Once the sides are assembled, attach the bottom panel to complete the box.
Step 4: Adding Finishing Touches
Install the trim around the bottom edge of the planter to conceal any gaps and give it a polished finish. If desired, paint or stain the exterior of the planter to match your deck or add a pop of color.
Step 5: Planting Your Flowers
Once your planter is complete, fill it with potting soil and plant your chosen flowers or plants. Make sure to leave enough room for the roots to grow and water regularly.
Safety Tips
Always wear appropriate safety gear, including goggles and gloves, when working with power tools. Ensure that your work area is well-lit and free of clutter. Double-check all measurements before making any cuts to avoid mistakes. If you’re unsure about any part of the process, consider seeking assistance from a more experienced builder or professional.
Conclusion
Building your own composite decking planters is a rewarding DIY project that can enhance the beauty and functionality of your outdoor space. With the right materials, tools, and attention to detail, you can create stunning planters that will bring life and color to your deck for years to come. Happy building!


Reviews
There are no reviews yet.